Tag: Traveling

  • Mount Pilatus: Everything You Need to Know Before You Go

    Mount Pilatus: Everything You Need to Know Before You Go

    If you’re visiting Lucerne, Mount Pilatus is one of those places you simply can’t miss. 

    Towering over Lake Lucerne at 2,132 meters (6,995 feet), Mount Pilatus is famous for its breathtaking panoramic views, hiking trails, and the world’s steepest cogwheel railway. Whether you’re looking for an adventurous hike or simply want to take in some of Switzerland’s most incredible scenery, there’s a reason this mountain is one of the country’s most popular day trips. 

    We spent the day exploring Mount Pilatus, and while there are a few things we’d do differently next time, it was easily one of the highlights of our Switzerland itinerary.

    How We Got to the Top

    Originally, our plan was to ride the famous Pilatus Cogwheel Railway, the steepest cogwheel railway in the world, climbing the mountain on gradients of up to 48%. It has been carrying visitors up the mountain since 1889, making the journey an attraction in itself. 

    Unfortunately, we visited before it was operating for the season, so we had to adjust our plans. Instead, we took the Panorama Gondola from Kriens, and honestly, we have zero regrets. 

    As the gondola slowly climbed higher into the mountains, we found ourselves disappearing into the clouds before suddenly emerging above them. It made the journey feel even more dramatic, and watching the landscape change below us was an experience in itself. 

    If you’re hoping to ride the cogwheel railway, be sure to check the operating schedule before your trip. It typically runs from mid-May through late November, while the gondolas operate for most of the year, aside from short maintenance closures. 

    Can You Hike Mount Pilatus?

    Yes! Many people hike to the summit, and if you’re an experienced hiker, it’s an incredible challenge. 

    For us, this was our first mountain experience in Switzerland, so we decided to take the gondola to the top and hike down instead. After hiking down ourselves, we are very glad we made that decision. 

    The descent alone was much more physically demanding than we expected, with steep switchbacks and uneven terrain. We couldn’t imagine tackling the entire climb uphill, especially if you’re not used to mountain hiking. If you’re debating whether to hike, be honest with your fitness level and experience. There’s absolutely nothing wrong with taking the gondola and simply enjoying the incredible scenery.

    What to Expect at the Summit

    The views from the top are absolutely breathtaking. On the day we visited, the mountain was surrounded by clouds, making everything feel incredibly dramatic. Eventually the clouds began to clear, revealing sweeping views of the surrounding Alps and Lake Lucerne. 

    One thing we weren’t fully prepared for was the weather. Even on a partially sunny day, it was cold, windy, and incredibly bright. The sunlight reflecting off the remaining snow and the white rooftops made sunglasses almost essential. 

    Travel Tip: Bring an extra layer and sunglasses, even if it’s warm down in Lucerne.

    Food at the Top

    Like many mountain destinations, food on Mount Pilatus comes with mountain prices. For us, two beers and two small sandwiches cost around $50. When you’re sitting nearly 7,000 feet above sea level surrounded by some of the most beautiful scenery in Switzerland, it’s part of the experience. There are several restaurants, cafes and even a hotel at the summit if you’d like to spend the night. 

    Should You Stay Overnight?

    Mount Pilatus offers overnight accommodations at the summit, and while waking up above the clouds certainly sounds incredible, we were actually happy we stayed in Lucerne. 

    Once the gondolas and railway stop running for the day, you’re essentially committed to staying on the mountain until transportation resumes the next morning. For us, a day trip was the perfect amount of time. That said, if your dream is watching the sunrise or sunset over the Swiss Alps without the daytime crowds, staying overnight could be an unforgettable experience.  

    Hiking Down Was One of Our Favorite Parts

    One of our favorite memories wasn’t actually standing at the summit, it was hiking back down. Taking our time allowed us to appreciate the mountain from a completely different perspective. We passed alpine meadows, grazing cows wearing their iconic swiss bells, and countless viewpoints we’d never have experienced from inside the gondola. Instead of feeling rushed, we simply enjoyed the journey down. Sometimes the best views aren’t found at the top, they’re found along the way. 

    Our Tips

    • If the Cogwheel Railway is on your bucket list, check the seasonal operating dates before booking. It generally runs from mid-May through late November, while the gondolas operate much longer.
    • If you’re not an experienced mountain hiker, consider taking the gondola up and hiking down. 
    • Bring an extra layer, it can be much colder at the summit than in Lucerne.
    • Sunglasses are a must, especially if there’s still snow.
    • Bring plenty of water if you plan to hike.
    • Expect food and drinks to be more expensive than in town.
    • Don’t rush back down. Some of our favorite views were found during the hike rather than at the summit itself. 

    Final Thoughts

    Mount Pilatus was our introduction to hiking in the Swiss Alps, and it couldn’t have been a better first experience. From riding through the clouds in the gondola to slowly making our way back down the mountain on foot, every part of the day felt like an adventure. 

    If you’re visiting Lucerne, we can’t recommend adding Mount Pilatus to your itinerary enough. Whether you ride the famous cogwheel railway, take the gondola, hike to the summit, or do a combination of all three. It’s an experience that showcases exactly why Switzerland is known for some of the most spectacular mountain scenery in the world.

  • Where We Ate/Drank In Belgium

    Where We Ate/Drank In Belgium

    📍Oh!MA

    Location: Ghent, Belgium

    Type: Plant-Based Restaurant

    Why We Recommend It: Even if you’re not vegetarian or vegan, don’t skip this place. It completely changed our expectations of plant-based food. The atmosphere is modern, welcoming, and one of the cutest restaurants we visited in Ghent.  

    Must Try: The burger! Kat said it was one of the best burgers she’s ever had (plant-based or otherwise) 

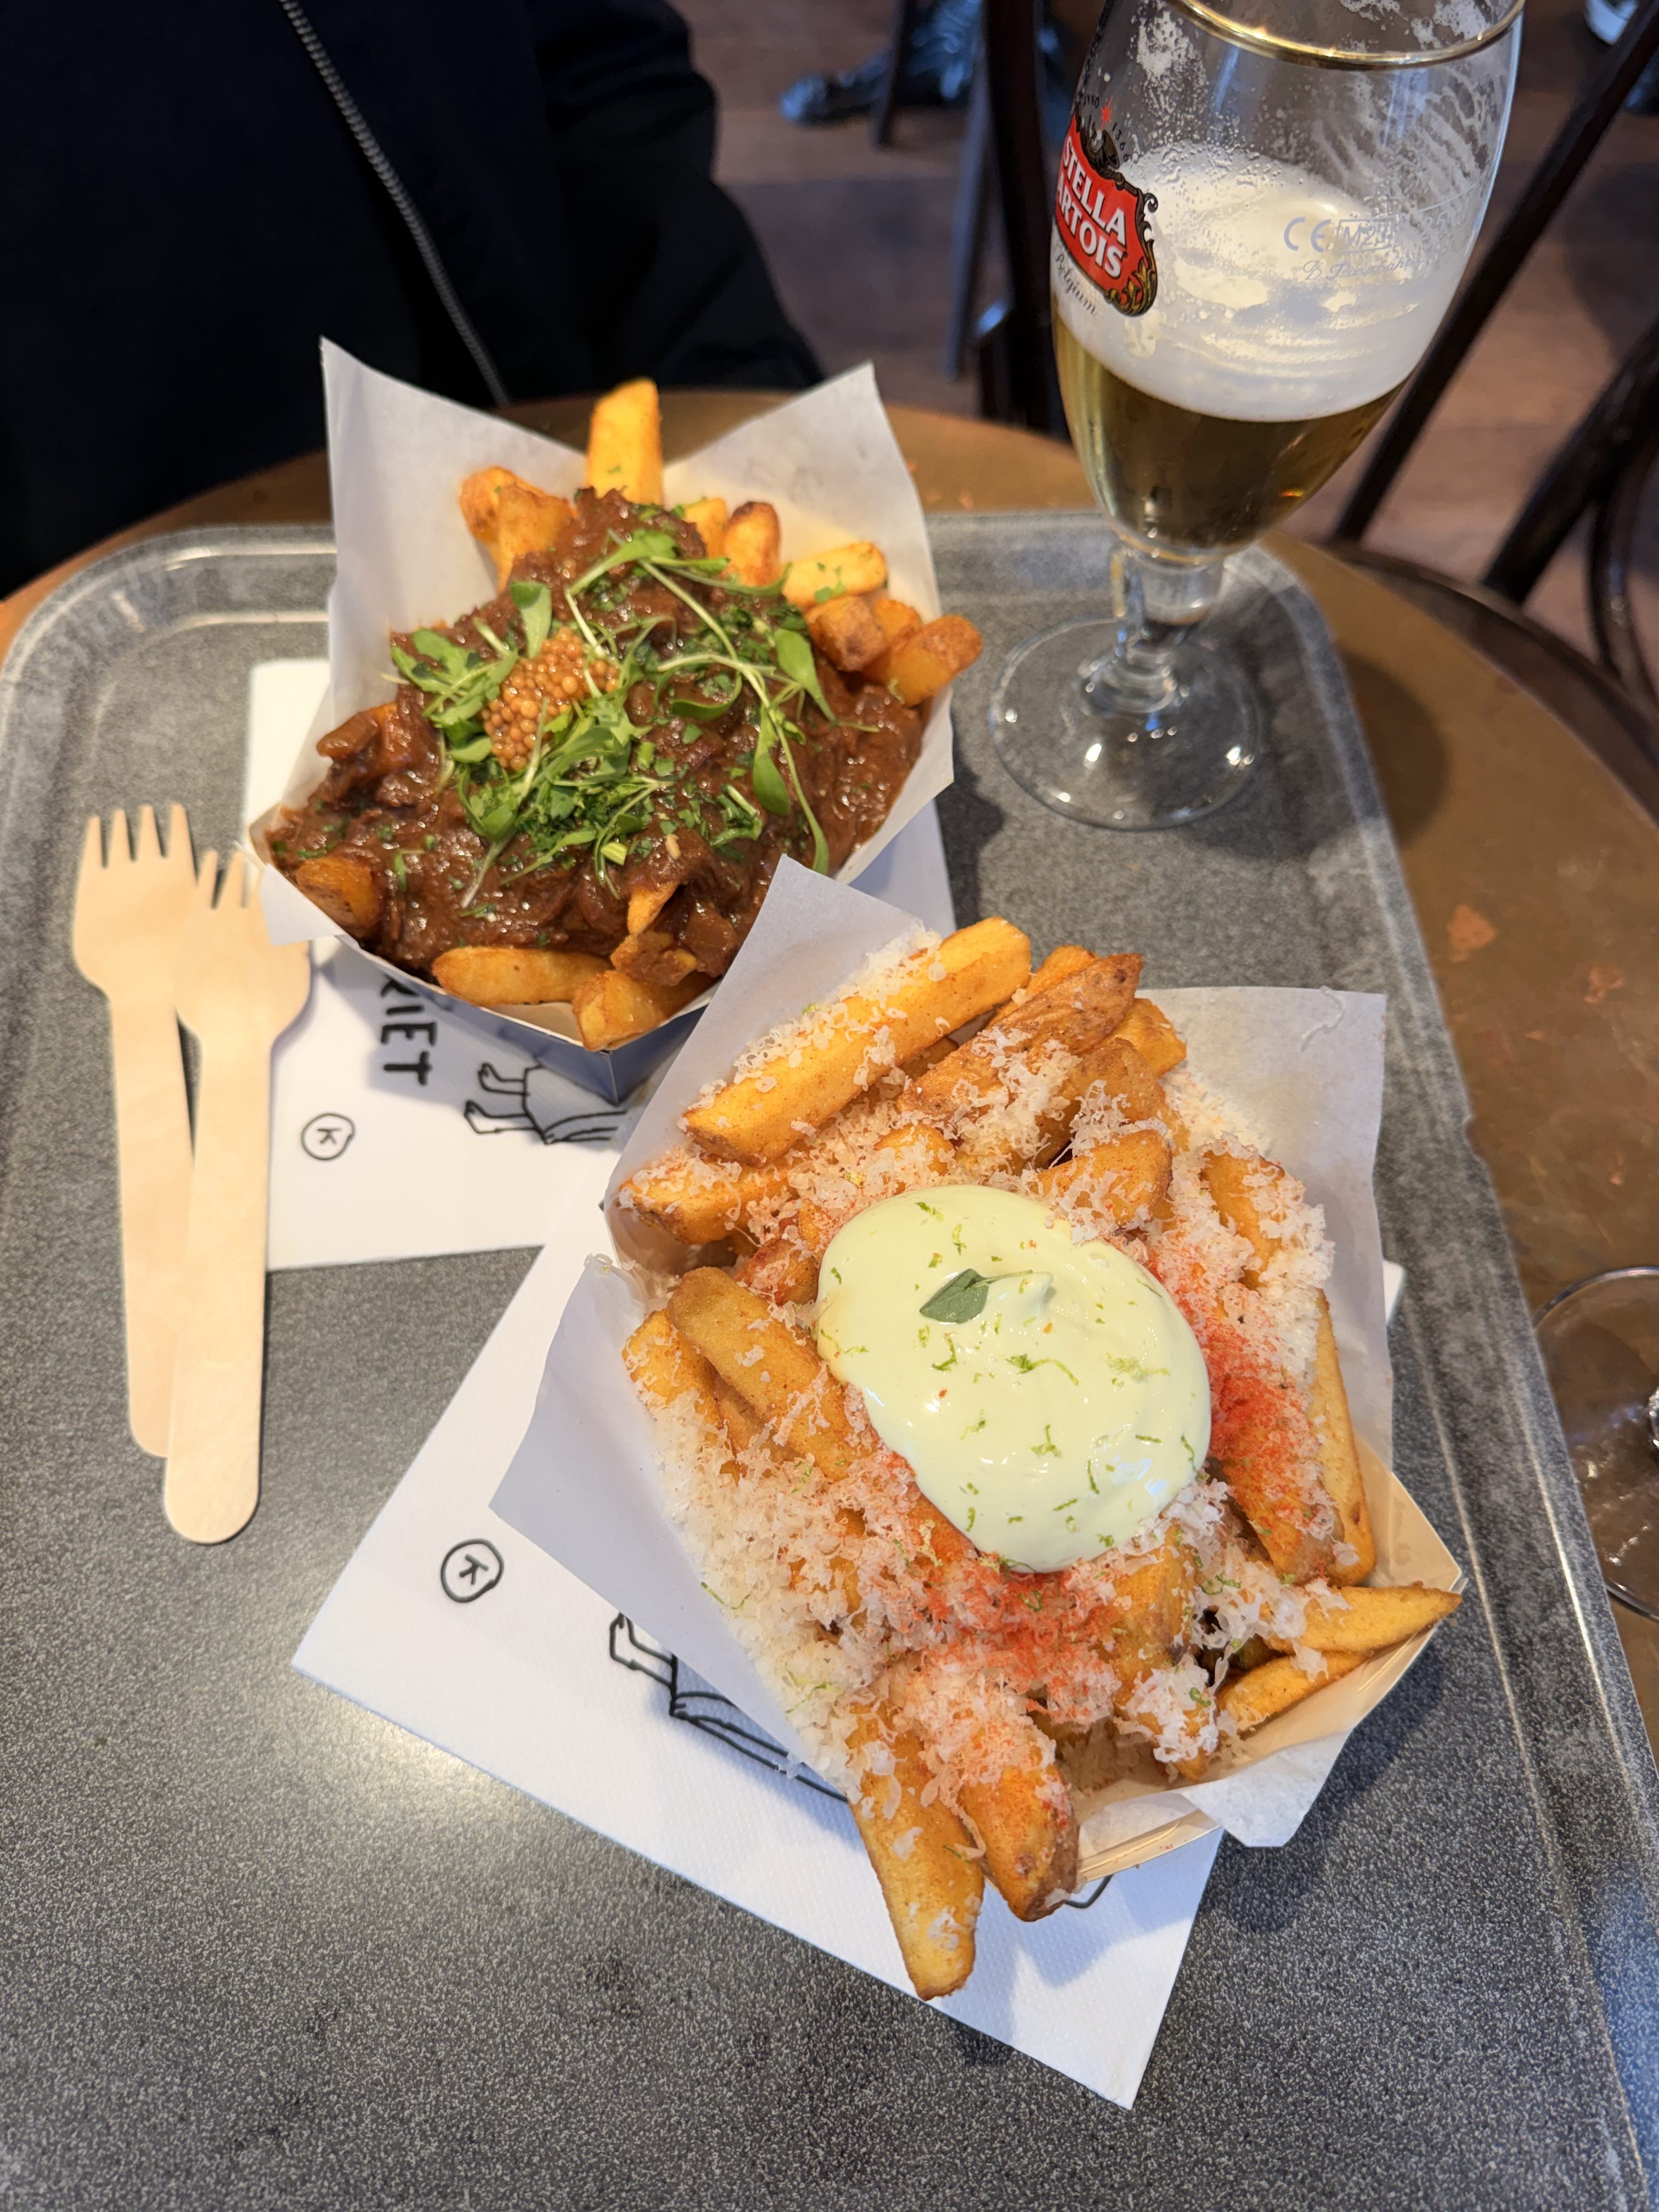
    📍Frites Atelier

    Location: Ghent, Belgium

    Type: Frites Shop

    Why We Recommend It:Belgium is famous for its fries, and this was easily our favorite place to try them. Perfectly crispy on the outside, fluffy on the inside, and served with delicious dipping sauces 

    📍Edel Rot

    Location: Ghent, Belgium

    Type: Wine Bar & Tapas

    Why We Recommend It: A cozy little wine bar with a relaxed atmosphere, friendly staff, and great small plates to share.

    📍Bar Terroir

    Location: Ghent, Belgium

    Type: Wine Bar

    Why We Recommend It: If you’re a wine lover like we are, this is another excellent stop while exploring Ghent. The atmosphere is intimate and perfect for slowing down with a glass of wine after a busy day. 

    📍De Alchemist

    Location: Ghent, Belgium

    Type: Cocktail & Beer Bar

    Why We Recommend It: A fun spot to grab a drink while exploring Ghent’s nightlife. Great atmosphere and a nice place to end the evening.

    📍Delirium Cafe

    Location: Brussels, Belgium

    Type: Beer Bar

    Why We Recommend It: One of our favorite nights of the entire Belgium trip. Delirium is famous for carrying thousands of beers from around the world, and it’s easy to see why it;s such a popular stop.

    Must Try: The beer flight. It’s a great way to sample several Belgian beers and discover your favorite style.

    📍Billie

    Location: Brussels, Belgium

    Type: Bar

    Why We Recommend It: A great place to grab a drink while exploring Brussels. The atmosphere was lively without feeling overwhelming, making it a fun stop during our evening out. 

    📍Bar Blu

    Location: Bruges, Belgium

    Type: Breakfast Restaurant

    Why We Recommend It: What stood out most was the incredibly friendly staff. Sometimes great service makes the experience, and this was one of those places where we immediately felt welcome.

    📍Chez Albert

    Location: Bruges, Belgium

    Type: Belgian Waffle Shop

    Why We Recommend It: If you’re only getting one Belgian waffle during your trip, this is a fantastic choice. Freshly made, warm, and topped with your choice of delicious toppings.

    📍The Spot

    Location: Bruges, Belgium

    Type: Breakfast & Brunch Cafe

    Why We Recommend It: A cozy brunch spot to fuel up before a day of wandering Bruges. Fresh food, great coffee, and a relaxing atmosphere 

    📍Bourgogne des Flandres

    Location: Bruges, Belgium

    Type: Brewery & Beer Tasting

    Why We Recommend It: One of the coolest places to enjoy a Belgian beer in Bruges. The outdoor seating along the canal makes it a perfect place to relax and soak in the city’s atmosphere. 

    Must Try: Try one of their signature beers or a tasting flight if available.

  • Best Place To Explore In Portugal

    Best Place To Explore In Portugal

    ,

    EUROPE • PORTUGAL • DOURO VALLEY

    Best Place To Explore In Portugal

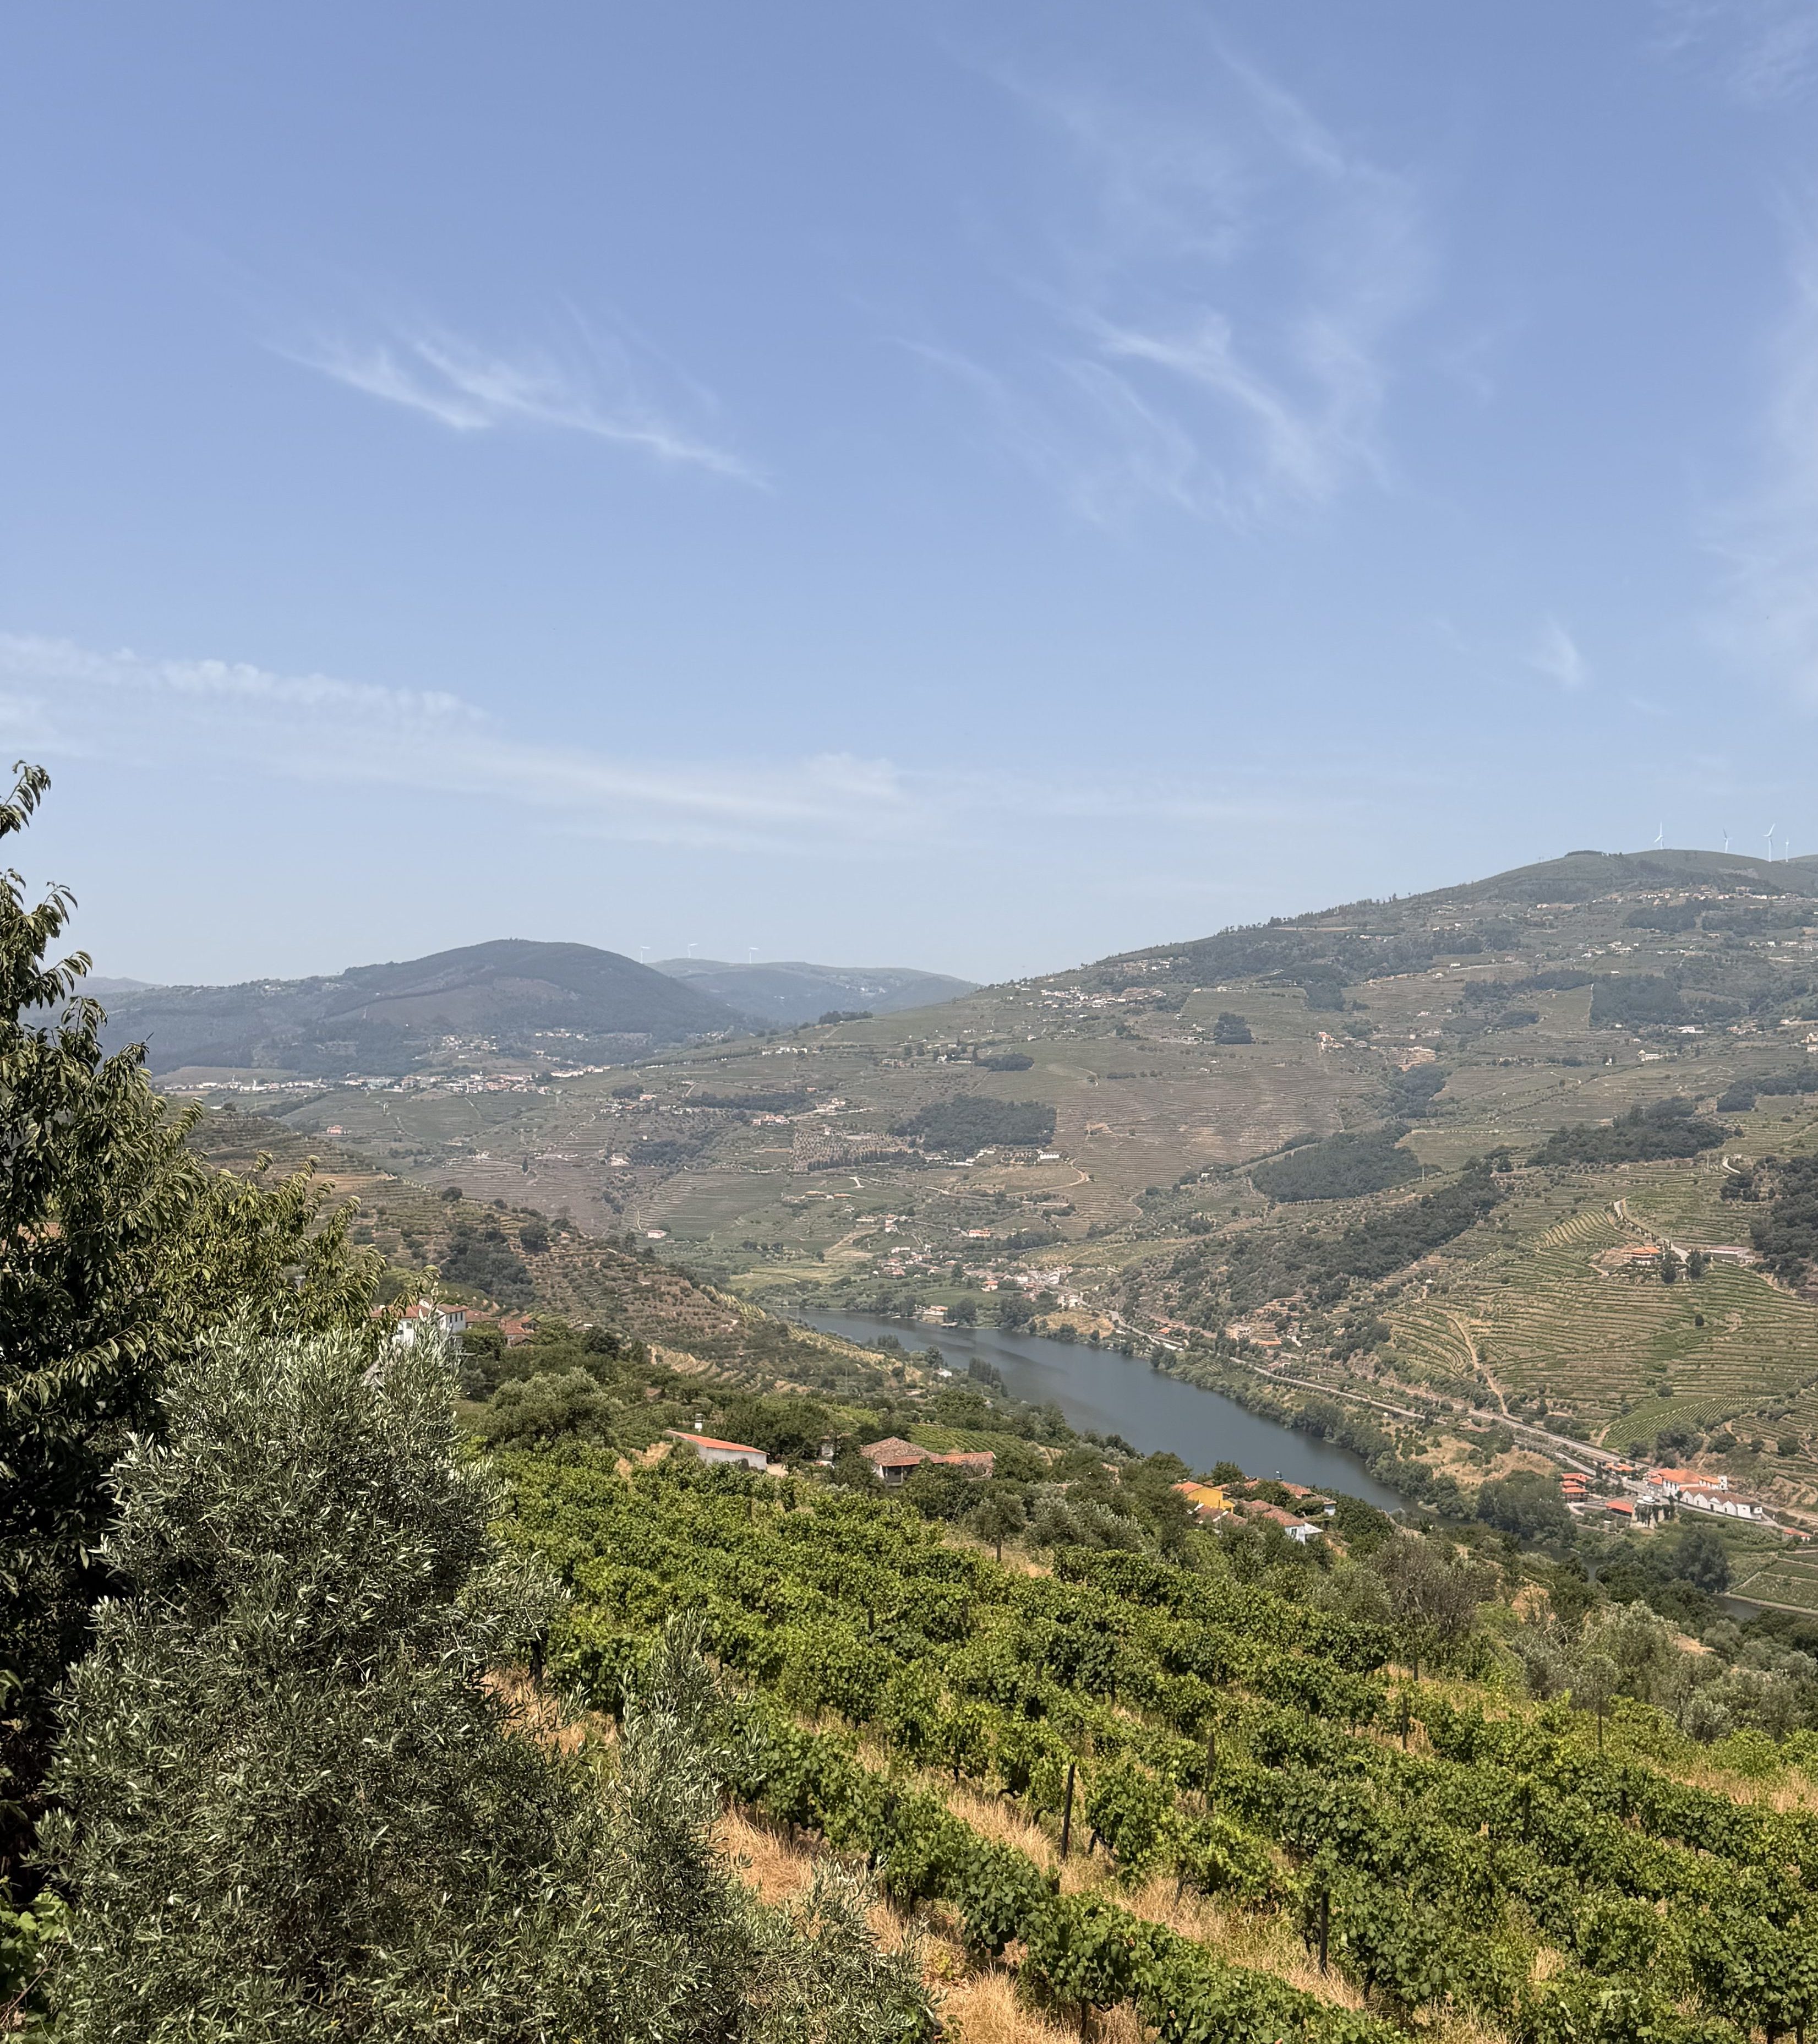
    Even if you’re not a huge wine drinker, the Douro Valley is worth visiting for the scenery alone. But once you learn about the history, meet the winemakers, and experience the wines firsthand, you’ll quickly understand why it’s considered one of Portugal’s greatest treasures.

    If there’s one place in Portugal we would recommend to everyone, it’s the Douro Valley. Just a couple of hours outside of Porto lies one of the most breathtaking wine regions we’ve ever visited. Rolling hills covered in terraced vineyards stretch as far as the eye can see, winding alongside the Douro River. Every turn offers another incredible view, and it’s one of those places where photos simply don’t do justice.

    A Little History

    The Douro Valley is one of the oldest wine-producing regions in the world and was officially established as the world’s first demarcated wine region in 1756. It’s also recognized as a UNESCO World Heritage Site, thanks to its centuries-old tradition of winemaking and the breathtaking terraced vineyards that have been carefully carved into the hillsides by generations of families. 

    The region is best known for producing Port wine, but today it’s equally respected for its exceptional red, white, and rosé table wines.

    One of the things we found most fascinating was learning how difficult it is to grow grapes here. The vineyards sit on incredibly steep slopes, where the vines must send their roots deep into the rocky schist soil in search of water. The stone terraces you see throughout the valley aren’t just beautiful; they help retain heat, stabilize the hillsides, and protect the vines throughout the changing seasons. It’s an incredible example of people working with nature rather than against it. 

    Our Wine Experience

    There are countless wineries throughout the Douro Valley, and honestly, you could spend several days exploring different ones. We visited two wineries during our day tour, and both offered completely different experiences. 

    🍷Adega Cooperativa de Penajóia

    Our first stop was Adega Cooperativa de Penajóia, and it ended up being one of the highlights of our day. What made this winery so memorable wasn’t just the wine; it was Catia. She was incredibly kind, welcoming, and passionate about what she does. Rather than simply pouring wine, she took the time to explain the history of the region, how the grapes are grown, and what makes Douro wines so unique. You could tell she truly loved sharing her knowledge, and that made the experience feel personal instead of rushed. It was one of those tastings where we left feeling like we had learned something, not just sampled a few wines. 

    🍷Quinta do Beijo

    Our second stop was Quinta do Beijo, and it was equally beautiful. The vineyard itself was stunning, with panoramic views overlooking the valley, and the wines were exceptional. We ended up purchasing a bottle of their rosé to have shipped home because it was our favorite rosé from the entire Europe trip. One thing we really appreciated was seeing how each winery had its own personality. While both produced incredible wines, each offered a completely different atmosphere and tasting experience. 

    Portuguese Wine

    One of the best parts of visiting the Douro Valley was learning more about Portuguese wine directly from the people who produce it. We sampled reds, whites, rosés, and Port wines while learning about the traditions that have been passed down through generations. 

    The Douro reds were especially memorable. They’re typically bold, rich, and full-bodied, making them perfect alongside grilled meats and hearty meals. 

    While traveling throughout Portugal, we also discovered Vinho Verde, or “Green Wine.” Despite its name, it’s not green at all. The name refers to the wine being enjoyed while it’s still young and fresh. Produced in Portugal’s Vinho Verde region north of Porto. It’s light, crisp, and incredibly refreshing, especially on a warm summer afternoon. If you’re visiting Portugal, we highly recommend trying a glass.

    Day Trip or Stay Overnight?

    We chose to visit Douro Valley as a guided day trip from Porto, and it worked out perfectly. Our guide handled the transportation, winery reservations, and itinerary, allowing us to relax, enjoy the scenery, and focus on the experience. If you have additional time, however, we’d absolutely recommend spending a night or two in the valley. Slowing down, enjoying the peaceful atmosphere, and visiting more wineries would make for an unforgettable getaway. 

    Our Tips

    • Reserve winery tastings in advance. Most wineries require reservations
    • If you don’t want to drive the winding mountain roads, consider booking a guided tour
    • Bring your camera; the views are incredible around every corner
    • Don’t rush. Douro Valley is meant to be enjoyed slowly
    • Recommend taking a boat tour along the Douro River; it’s breathtaking
    • If you discover a wine you love, many wineries can arrange international shipping
  • 25 Things We Wish We Knew Before Backpacking Europe

    25 Things We Wish We Knew Before Backpacking Europe

    Planning

    1. Look at train routes before booking accommodations

    One of our biggest planning mistakes was focusing on the map rather than the actual travel time between destinations. Two cities may look close together, but once you factor in train schedules, transfers, and travel time to and from stations, a “short trip” can quickly become a 6-hour travel day. 

    When planning your itinerary, look at how you’ll actually get from one destination to the next before booking accommodations. Doing this helped us adjust our route and would have allowed us to spend more meaningful time exploring instead of constantly feeling rushed. 

    1. Give yourself an extra day in almost every city

    If we could change one thing about our itinerary, it would be adding one more day to nearly every destination. Travel days are more exhausting than they seem. Between packing, checking out, walking to the station, taking trains, finding your hotel, and settling in, an entire day can disappear. Having an extra day gives you time to relax, do laundry, sleep in, or simply enjoy a city without feeling like you’re racing from one attraction to the next. 

    1. Don’t overpack your itinerary

    It’s tempting to try to see everything, especially if it’s your first time in Europe. But some of our favorite memories weren’t famous landmarks. They were sitting at a park, wandering quiet streets, or watching the sunset with a glass (or bottle) of wine. Leave room for spontaneity. You don’t have to check every attraction off your list to have an incredible trip. 

    Packing

    1. Bring backpacks instead of suitcases

    If you’re traveling between multiple cities, backpacks are a game changer. Europe is filled with cobblestone streets, staircases, uneven sidewalks, and train stations without elevators. We watched countless people struggle dragging heavy suitcases across the streets while we simply threw our backpacks on and kept walking. We never regretted bringing backpacks instead. 

    1. Pack less than you think you’ll need

    Even though we packed fairly light, we still found ourselves wearing the same outfits over and over. Laundry is available almost everywhere, and if you realize you forgot something, chances are you can buy it along the way. Plus, buying a sweater or shirt during your travels makes for a much more meaningful souvenir than bringing clothes you never end up wearing. 

    1. Shipping items home is easier than you think

    As our trip went on, our backpacks slowly became heavier with souvenirs and a few extra clothing purchases. Rather than stress about fitting everything on our flight home, we shipped a box home through DHL. The process was much easier and more affordable than we expected. If you’re traveling for an extended period, it’s a great option to keep in mind. 

    1. Carry a foldable tote bag for groceries or beach days

    This ended up being surprisingly useful throughout our trip. Whether we were grabbing groceries, heading to the beach, or carrying snacks for a long train ride. Having a lightweight reusable tote bag made life much easier. It takes up almost no room in your backpack but comes in handy far more often than you’d expect. 

    1. Leave room in your backpack for souvenirs.

    Don’t pack your backpack completely full before you leave. You’ll almost certainly find things you want to bring home, whether it’s wine, clothing, postcards, or gifts for family and friends. Leaving a little extra space saves you from trying to cram everything in at the end of your trip. 

    Accommodations

    1. A kitchen can save you a lot of money

    One thing we really appreciated was having access to a kitchen whenever possible. While trying local restaurants was one of our favorite parts of traveling, cooking breakfast or dinner a few times each week helped stretch our budget without taking away from the experience. 

    1. Think about your evenings too

    When booking accommodations, it’s easy to focus only on where you’ll sleep. But after walking 20,000+ steps every day, having a balcony, patio, or a comfortable common area to relax became something we really valued. If you’re traveling with friends or family, those evenings together become some of your favorite memories. 

    1. Location is everything

    We’d much rather stay in a smaller room in the heat of the city than a larger room far away. Being within walking distance of attractions, restaurants, and public transportation saved us both time and money throughout our trip. 

    Budget

    1. Track your expenses

    We tracked nearly every purchase throughout our trip, from coffee and groceries to excursions and city taxes. Not only did this help us stay within budget, but it also showed us where our money was actually going. By the end of our 3 months, we averaged about $103 per person per day, which included far more than we expected. 

    1. Grocery stores are your best friend

    Some of our favorite meals came from local grocery stores. Not only are they a great way to save money, but they’re also a fun way to experience everyday life in another country. We loved wandering through the aisles and trying snacks, pastries, cheeses, and drinks we couldn’t find back home. 

    1. Budget for city taxes

    One expense we didn’t initially think about was tourist or city taxes. Many hotels collect a small tax at check in that isn’t always included in your booking price. It’s usually only a few euros, but over several weeks or months, those charges can add up. 

    1. Always carry a small amount of cash 

    While credit cards were accepted almost everywhere, there were still times when cash came in handy. Some public restrooms, small cafes, market vendors, or local shops preferred cash. Having a small amount of local currency saves us from unnecessary stress. 

    Transportation

    1. Learn your rail system before you leave

    If you’re planning to travel by train, spend a little time learning how the system works before your trip. Whether you’re using Eurail or individual tickets, understanding train schedules, reservations, and platforms ahead of time will make your travel days much less stressful. 

    1. Don’t underestimate travel days

    A 5-hour train ride rarely means only 5 hours. Packing, checking out, getting to the station, boarding, transferring trains, and checking into your next accommodation can easily take an entire day. Plan accordingly. 

    1. Some trains require seat reservations even with Eurail

    This surprised us at first. Although the Eurail Pass covers your train fare, many high speed and international routes still require paid seat reservations. Research your route ahead of time so you aren’t caught off guard. 

    Food

    1. Make restaurant reservations

    Some of our favorite restaurants filled up days or even weeks in advance. If there’s a place you really want to experience, don’t wait until the last minute to book.

    1. Try the regional specialty 

    Even if it’s something you’ve never had before. Whether it was escargot in France, fondue in Switzerland, or paella in Spain, trying local specialities became some of our favorite memories. You may end up discovering a new favorite dish. 

    General Advice

    1. Should season (spring and fall) is one of the best times to visit Europe

    We traveled during the shoulder season into the busy season and realized how much we enjoyed our days in the shoulder season more. The weather was generally pleasant, attractions were less crowded, and accommodations were often more affordable than during the peak summer months. 

    1. Be flexible

    Not everything will go according to plan and that’s okay. SOme of our favorite experiences happened because we changed our itinerary, followed a recommendation from a local, or simply decided to explore without a plan. 

    1. Slow down

    You don’t need to be sightseeing from sunrise to sunset every day. Some of our favorite moments were enjoying coffee in a quiet square, watching people pass by, or sitting along a river with a bottle of wine. Those slower moments are often the ones you’ll remember the most. 

    1. Talk to people

    Some of the best recommendations we received came from bartenders, hotel hosts, restaurant staff, tour guides, and fellow travelers. Don’t be afraid to ask questions. Locals often know the hidden gems that never appear in travel guides. 

    1. Don’t wait for the “perfect” time

    There will always be a reason to put your dream trip off until next year. Life gets busy. Responsibilities grow. Plans change. If traveling is something you’ve always dreamed about, don’t spend your life waiting for the “perfect” moment, because it may never come. We’re incredibly grateful we took the leap when we did, and the memories we made will stay with us forever.

  • How We Planned Our 3-Month Backpacking Trip Through Europe

    How We Planned Our 3-Month Backpacking Trip Through Europe

    Planning a three-month trip through Europe can feel overwhelming at first. We definitely had moments where we asked ourselves, “Where do we even begin?” Looking back now, the process wasn’t nearly as intimidating as it seemed, it just required taking it one step at a time. 

    Here’s exactly how we planned our trip from start to finish, along with what we learned and what we’d do differently if we were planning it again. 

    Step 1: Dream First, Plan Later

    Before we worried about flights, budgets, or transportation, we simply made a list of everywhere we wanted to go. Some countries had been on our bucket list for years, while others were places we’d heard incredible things about from friends and family. Once we had our initial list, we started asking everyone we knew who had traveled to Europe questions like:

    • “What was your favorite country?”
    • “Is there anywhere you’d skip?”
    • “What’s underrated?”
    • “Where should we spend more time?”

    This helped us add destinations we hadn’t considered while also crossing a few off our list. 

    Step 2: Let ChatGPT Help Build the Route

    Once we had our dream destinations, we turned to one of our favorite planning tools, Chat GPT. Honestly, we used ChatGPT throughout almost our entire planning process and even while we were traveling. We gave it our list of countries and cities and asked it to create the most logical travel route. One thing we quickly learned is that the order of your trip matters just as much as the destinations themselves. 

    Originally, our plan was to begin in Lisbon, Portugal, and finish in Nice, France. But after thinking about the weather, we realized we’d be starting our trip in early April. Southern coastal destinations like Portugal and Spain would be much more enjoyable later in the spring. So, we completely flipped our itinerary.

    Instead, we started in France and gradually worked our way around Europe to finish in Portugal. Looking back, that was one of the best decisions we made. Each destination seemed to get warmer as the trip went on, and we were able to enjoy beaches, outdoor cafes, and coastal towns during much nicer weather. 

    Step 3: Decide How Long to Stay

    Once our route was finalized, we went city by city. Again, ChatGPT became incredibly helpful. We asked questions like:

    • “How many days should we spend in Florence?”
    • “Is two days enough for Prague?”
    • “Is Cinque Terre worth three nights?”
    • “What’s the ideal amount of time for Barcelona?”

    We also compared those recommendations with travel blogs, YouTube, and other travelers’ experiences. Overall, the recommendations were surprisingly accurate. 

    What We’d Do Differently

    If we could plan the trip again, we’d add one extra day to almost every city. 

    When you’re constantly moving every few days, you don’t realize how exhausting travel days become. 

    • Packing
    • Checking out
    • Getting to the station
    • Taking a 5hr train
    • Checking into the next hotel
    • Finding dinner

    Suddenly, your “travel day” is your entire day.

    That extra day would have given us time to relax, do laundry, sleep in, or simply enjoy the city without feeling like we had to be sightseeing every minute. 

    Step 4: Pay Attention to Travel Time

    This is probably our biggest piece of advice. Don’t just look at a map. Actually look at how long it takes to travel between destinations. Some cities that look close together still require:

    • Multiple train transfers
    • 5-6 hours of travel
    • Early morning departures
    • Long walks between stations

    Those long travel days often left us with very little time to explore our next destination. If we planned the trip again, we’d coordinate the number of nights in each city based on the travel time required to get there. Sometimes spending one extra night makes the entire trip much more enjoyable. 

    Step 5: Organize Everything

    Once we finalized our route, we entered everything into Polarsteps. This quickly became one of our favorite travel apps. Not only did it map our entire route visually, but it also let us document each destination with photos and journal entries that friends and family could follow in real time. 

    One of our favorite features is that you can turn your trip into a professionally printed travel book after your journey. We ordered ours, and it’s something we’ll treasure forever. 

    Step 6: Book Flights and Accommodations

    Now it was time to start making everything official. Booking accommodations naturally locks you into an itinerary, but many hotels offer free cancellation until a few weeks before arrival. This ended up helping us several times. 

    As our trip evolved, we cancelled a few reservations and extended our stay in places we unexpectedly fell in love with. 

    We primarily booked through:

    Our priorities were simple:

    • Clean
    • Safe
    • Great location
    • Strong reviews

    We aimed to spend around $100 per night total, or approximately $50 per person.

    Hostels can certainly save money, but since this was our first extended backpacking trip, we preferred having our own private space. Booking 6-12 months in advance also helped us secure much better prices. 

    One lesson learned the hard way? Always double check your dates and location before confirming your reservation. Some bookings are completely non-refundable. 

    Dividing Responsibilities

    One thing that made planning much easier was dividing responsibilities. 

    Ben became our hotel expert. He researched accommodations, compared reviews, and booked our stays. I focused almost entirely on transportation. Instead of both of us trying to plan everything, we each became responsible for one major piece of the trip. 

    It made the planning process much less overwhelming. 

    Step 7: Transportation

    We knew early on that we didn’t want to rent a car. Driving in unfamiliar countries, dealing with parking, toll roads, and different driving laws wasn’t something we wanted to worry about. Thankfully, Europe has an incredible public transportation system. 

    After weeks of research, we discovered Eurail. We purchased the 3-Month Unlimited First Class Global Pass. I’ll be honest… Learning Eurail wasn’t easy. At first it felt confusing. The reservations, passes, regional trains, high-speed trains, night trains etc. There was definitely a learning curve. But after enough research, everything finally clicked. 

    I’ll write a separate article explaining exactly how Eurail works because it deserves an entire guide on its own. 

    Step 8: Travel Essentials

    Planning wasn’t just about booking transportation and hotels. We also research everything we’d need to live abroad for three months. 

    Some of the things we prepared included:

    • Travel health insurance
    • Passport copied left with family
    • Digital passport copies
    • eSIM phone plans
    • Packing strategies
    • Luggage choices

    We ended up using Saily for our eSIM and had excellent service throughout Europe. We also purchased travel health insurance. No one ever asked to see proof, but having coverage gave us peace of mind. Luckily, we never needed it. 

    Step 9: Keep Saving & Book Activities Later

    Even after the major bookings were finished, we continued saving money each month leading up to the trip. One thing we intentionally didn’t do? Book every activity months in advance. 

    Since we traveled during shoulder season, we found that many experiences (boat tours, cooking classes, museums, and wine tasting) still had plenty of availability, some even at a discount. Instead of locking ourselves into a rigid schedule, we usually booked excursions one to two weeks before, or even just a day or two in advance. That flexibility allowed us to adjust our plans based on weather, how we were feeling, and recommendations we received while traveling. 

    Final Thoughts

    Planning a three-month trip can be intimidating, but looking back, it all came together by taking one step at a time. 

    Start with the places you dream about. Talk to people who have been there. Use the planning tools available to you. Stay flexible. And don’t be afraid to adjust your plans along the way. Some of our favorite memories came from changes we never expected to make. 

    Most importantly, remember that your itinerary doesn’t have to be perfect. Ours certainly wasn’t. We learned as we went, made adjustments, and came home with experiences we’ll never forget. 

    If our story helps make planning your own adventure feel a little less overwhelming, then this blog has already accomplished exactly what we hoped it would.

    JOIN OUR ADVENTURE

    SUBSCRIBE TO OUR NEWSLETTER AND STAY UP TO DATE WITH OUR LATEST TRAVELS

    We don’t spam! Read our privacy policy for more info.